I’ve been anxiously waiting for the new Terraform Resources for vRealize Automation Cloud. Well the wait is finally over. Version 8.20 was released on 8/30/2020. You can view the Release Notes here.
Now why would you want to use Terraform in vRA Cloud? You can already do a bunch out of the box. But what if you wanted to deploy an AWS EC2 instance with an encrypted boot disk? That is not available.
Terraform to the rescue. You can use Terraform to fill those kind of gaps without using a vRealize Orchestrator or Extensibility Appliance.
In this article I’ll show you how to deploy a basic AWS EC2 instance with an encrypted boot disk using the new Terraform Resource.
First you will need to setup your vRAC environment for Terraform. This is well documented in the How to include Terraform configuration in Cloud Assembly documentation.
The Terraform configuration files and blueprint are available here.
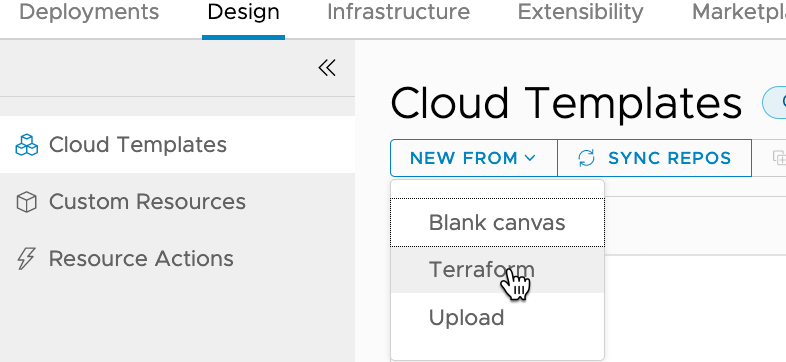
Now on to the good stuff. Within vRAC create a new Cloud Template (renamed from Blueprints), by clicking on Design -> NEW FROM -> Terraform.
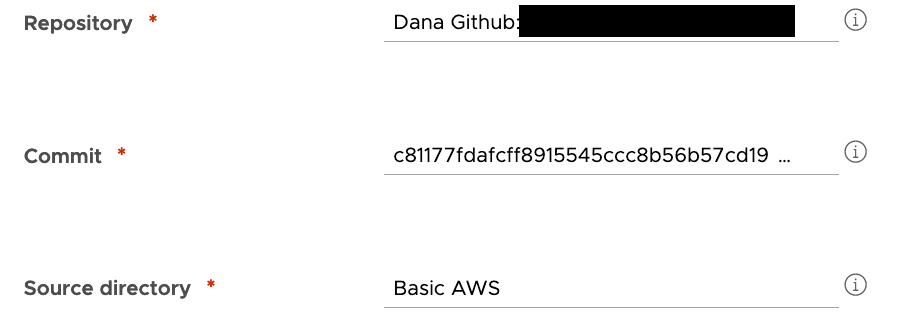
Enter the Template name and project on the next page, then click Next. The next page is where you select your GitHub Repository, Commit and the Source Directory. Then click Next.
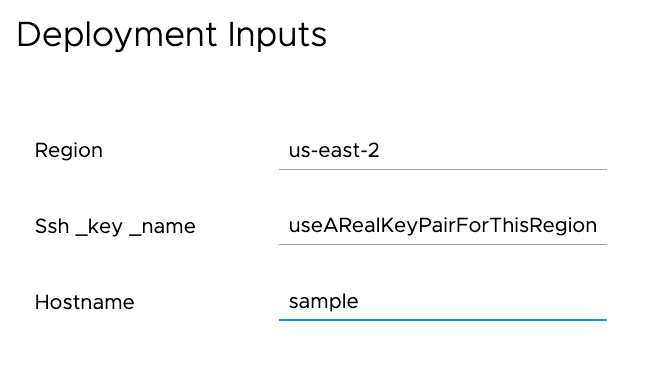
For this example I’m leaving all of the variables as they come from variables.tf in the source directory. Click Next. This will bring you to the designer page.
The code will look something like this, with one notable exception depending on how your repo’s directory structure is laid out. The wizard assumes your sourceDirectory is directly off the root. For example root/sourceDirectory. But what if you have a path that looks like root/terraform/sourceDirectory? The wizard will not add ‘/terraform’ automagically. You will need to fix it (sample is already fixed).
inputs:
  region:
    type: string
    default: us-east-2
  ssh_key_name:
    type: string
    default: changeMe
  hostname:
    type: string
    default: changeMe
resources:
  terraform:
    type: Cloud.Terraform.Configuration
    properties:
      variables:
        region: '${input.region}'
        ssh_key_name: '${input.ssh_key_name}'
        hostname: '${input.hostname}'
      providers:
        - name: aws
          # List of available cloud zones: Will get populated during create from
          cloudZone: *********
      terraformVersion: 0.12.26
      configurationSource:
        repositoryId: XXXXXXXXX
        commitId: XXXXXXXXX
        sourceDirectory: /terraform/Basic AWS
If all goes as expected, you can now deploy the new template.
Make sure to change the default variable values to match your environment. The Ssh_key_name needs to exist in the region you are deploying into.
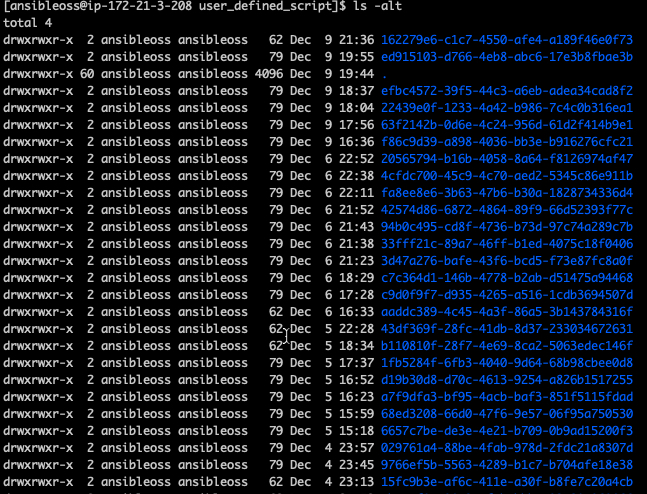
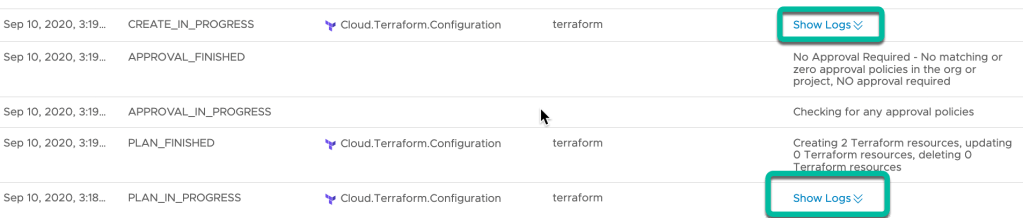
Click on the Deployment History to see the Terraform Plan and Apply logs. They can be viewed by clicking ‘Show Logs” on the PLAN_IN_PROGRESS or CREATE_IN_PROGRESS status lines.
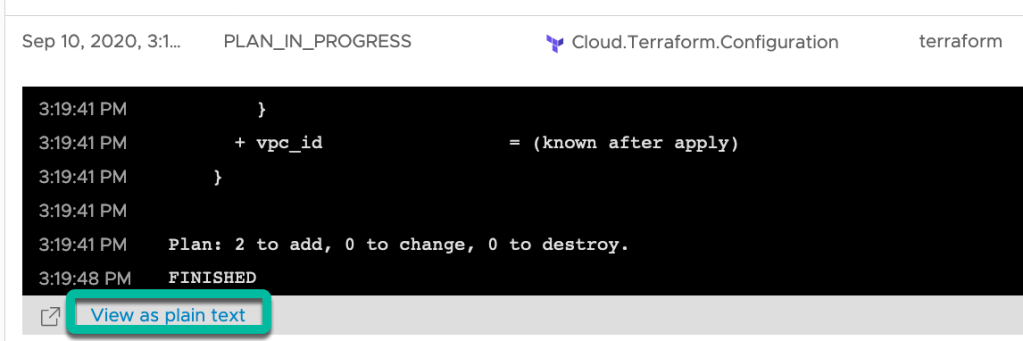
The logs can also be viewed in a new browser tab by clicking on ‘View as plain text’ from the expanded ‘Show Logs’ window.

Hopefully the instance deployed correctly. If so, take a coffee break. This gives vRAC time to discover the new ‘aws_instance’ and enable some day 2 actions.

The day 2 actions vary depending on the deployed machine type. You can find more information on page 416 of the Using and Managing VMware Cloud Assembly documentation.
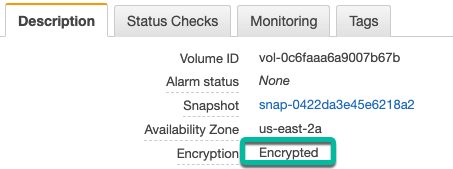
But did the boot disk actually get encrypted? Yes! Here is a screenshot of the boot volume.
As you can see, the new Terraform Resource is a great way to fill in vRAC deployment gaps without using extensibility.
Stay tuned. More to come.