This is the second part of this series. In this article we will complete the configuration of the InfoBlox, then setup IPAM in vRealize Automation Cloud (vRAC). And finally deploy a two machine blueprint to test the Allocation and Deallocation Lambda functions.
The first thing is to add some attributes required by vRAC within InfoBlox. Click on Administration -> Extensible Attributes. Add the two attributes shown below.
- VMware NIC index (lower case I), type Integer
- VMware resource ID, type String
Click on the Add Button, type in the new Attribute name and Type, then click Save & Close. Then repeat for the other Attribute.

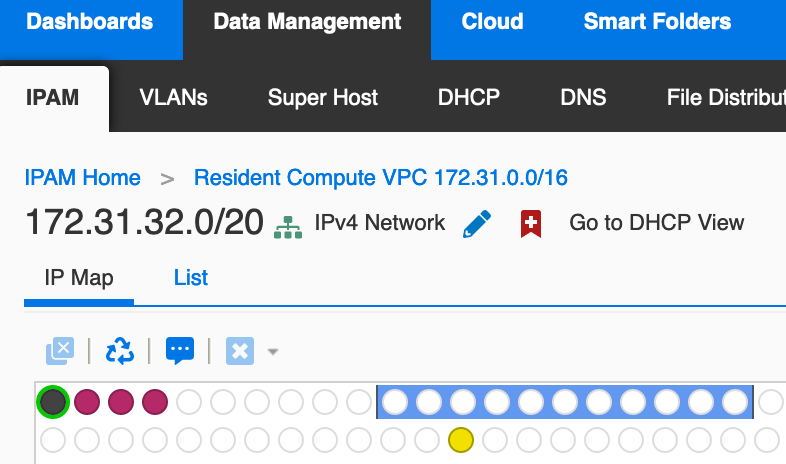
Next we need to set up an IPAM range. Here I’m going to create a small range in 172.31.32.0/16. Click on Data Management -> IPAM. Select List, then check the box next to 172.31.32.0/16.
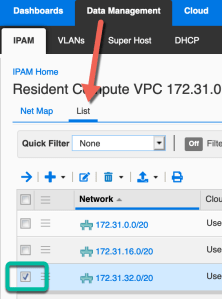
Click Add -> Range -> IPv4.

Add the range following these steps.
- Step 1, Next
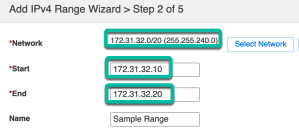
- Step 2, Enter the range start/end and Range name. Then Next.
- Step 3, Next
- Step 4, Next
- Step 5, Save & Close
Download the InfoBlox Plugin from the VMware Exchange.
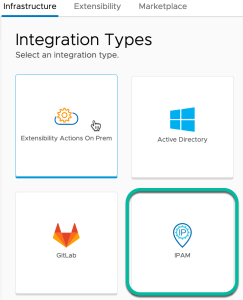
Now to add the endpoint in vRAC. Click on Infrastructure -> ADD INTEGRATION. Then click on IPAM.
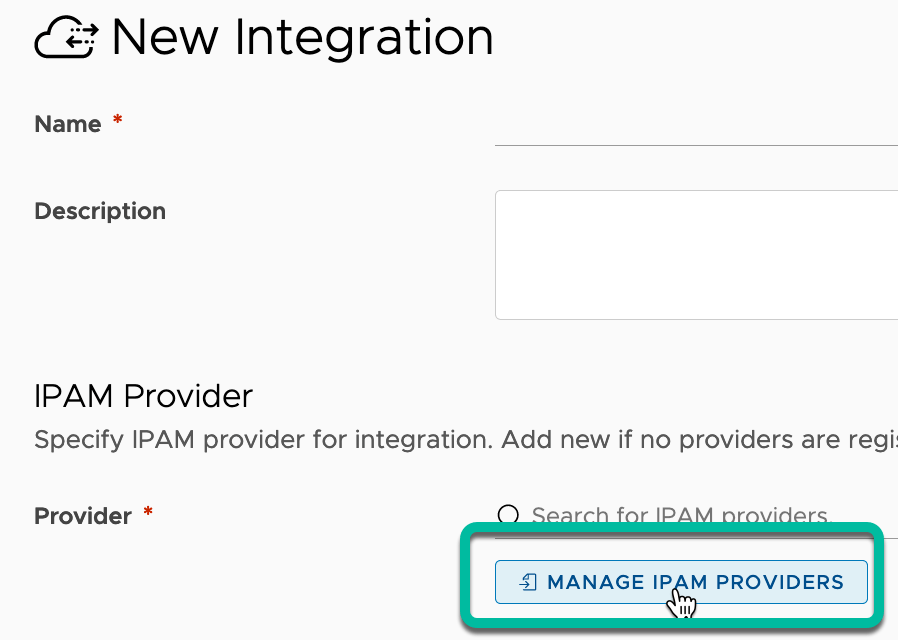
Click on MANAGE IPAM PROVIDERS.
Then IMPORT PROVIDER PACKAGE, then select the package you downloaded earlier.

The import will take a few minutes. Next select Infoblox from the Provider drop-down box.

Give the Integration a name, select your Running Environment (Cloud Account), Username, Password, and Hostname (IP or hostname. Example 10.10.10.10 or myipam.corp.local. Do not append HTTPS). Then check the box next to Infoblox.IPAM.DisableCertificateCheck. Then the pencil to edit.
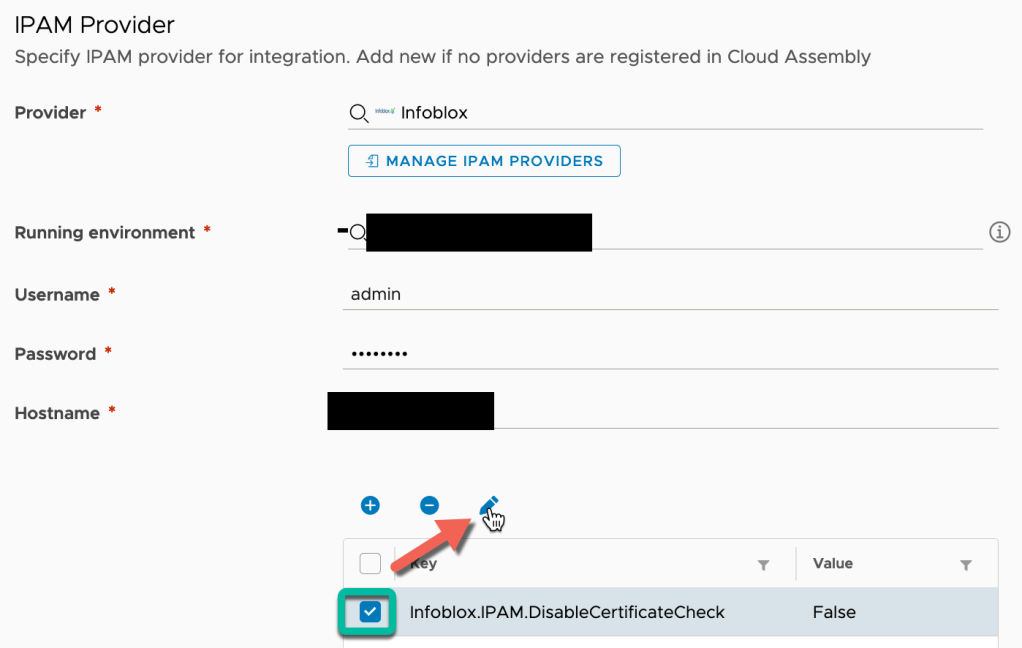
Change Value to True to disable the certificate check.

Next Validate the connection and Save it.

Next assign the IPAM range to a vRAC network.
Goto Infrastructure -> Networks, then select the network hosting 172.31.32.0/16. Click the box to the left, then MANAGE IP RANGES.
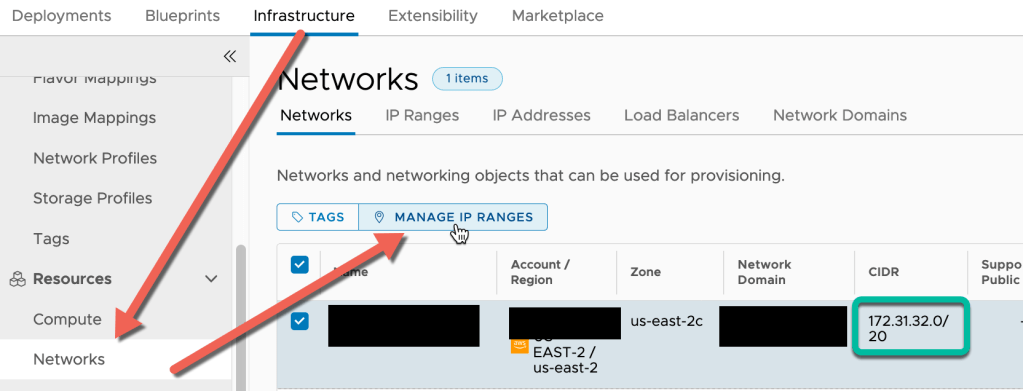
Select External -> Your Provider -> and your Address space (default). Then check the network hosting your IPAM Range.

Add the network to an existing or new Network Profile.
Now it’s time to test the integration. Here I have a blueprint with two machines. The first will get the next available IP out of the Range (172.31.32.10). The second will be assigned the user requested IP of 172.31.32.20.
formatVersion: 1
inputs: {}
resources:
  Cloud_Network_1:
    type: Cloud.Network
    properties:
      networkType: existing
      name: ipam
      constraints:
        - tag: 'ipam:infoblox_aws'
  Cloud_Machine_1:
    type: Cloud.Machine
    properties:
      image: Ubuntu 18.04 LTS
      flavor: generic.tiny
      remoteAccess:
        authentication: keyPairName
        keyPair: id_rsa
      Infoblox.IPAM.Network.dnsSuffix: corp.local
      # Infoblox.IPAM.createHostRecord: false
      # Infoblox.IPAM.createAddressRecord: false
      # Infoblox.IPAM.Network.enableDns: false
      # Infoblox.IPAM.Network.dnsView: somethingElse
      networks:
        - network: '${resource.Cloud_Network_1.id}'
          assignment: static
          # will assign first available if address is not set
          # address: 172.31.15.11
          assignPublicIpAddress: false
  Cloud_Machine_2:
    type: Cloud.Machine
    properties:
      image: Ubuntu 18.04 LTS
      flavor: generic.tiny
      remoteAccess:
        authentication: keyPairName
        keyPair: id_rsa
      Infoblox.IPAM.Network.dnsSuffix: corp.local
      # Infoblox.IPAM.createHostRecord: false
      # Infoblox.IPAM.createAddressRecord: false
      # Infoblox.IPAM.Network.enableDns: false
      # Infoblox.IPAM.Network.dnsView: somethingElse
      networks:
        - network: '${resource.Cloud_Network_1.id}'
          assignment: static
          # will assign first available if address is not set
          address: 172.31.32.20
          assignPublicIpAddress: false
Deploy the blueprint, then check to see if the Lambda function run. Click on Extensibility -> Action Runs, then change the run type to INTEGRATION RUNS. Then click on the first Infoblox_AllocateIP Action. The assigned IP will be in the Outputs section near the end of the JSON.
{
  "ipAllocations": [
    {
      "domain": "corp.local",
      "ipRangeId": "range/ZG5zLmRoY3BfcmFuZ2UkMTcyLjMxLjMyLjEwLzE3Mi4zMS4zMi4yMC8vLzAv:172.31.32.10/172.31.32.20/default",
      "ipVersion": "IPv4",
      "properties": {
        "Infoblox.IPAM.RangeId": "range/ZG5zLmRoY3BfcmFuZ2UkMTcyLjMxLjMyLjEwLzE3Mi4zMS4zMi4yMC8vLzAv:172.31.32.10/172.31.32.20/default",
        "Infoblox.IPAM.Network.dnsView": "default"
      },
      "ipAddresses": [
        "172.31.32.20"
      ],
      "ipAllocationId": "/resources/network-interfaces/ebef4233-6e94-411d-9f9f-f26096acaa58"
    }
  ]
Looks good so far. Now let’s check InfoBlox. Login, then go to Data Management -> IPAM.

Then check to see the hosts where added to corp.local. Click on Data Management -> DNS -> corp.local. You should see the two new entries.

Now destroy the deployment to make sure the IPAM and DNS entries are cleaned up.
The DNS entries where also removed.
So there you have it, vRAC, AWS and InfoBlox integration.
