The next two articles will discuss how to setup InfoBlox for AWS as an IPAM provider to vRealize Automation Cloud (vRAC). InfoBlox will be hosted in AWS using a community AMI. I’ll be using the latest version (1.0) of the VMware InfoBlox vRA 8.x plugin available on the VMware Solution Exchange, and InfoBlox version 8.5.0 (Any version that supports WAPI v2.7 should work).
Two AWS accounts are needed, one for InfoBlox vDiscovery and the other for vRAC AWS Cloud Account.
First the InfoBlox vDiscovery user, create a role following the directions on page 35 of the vNIOS for AWS document. Then create a new user, and download the credentials.
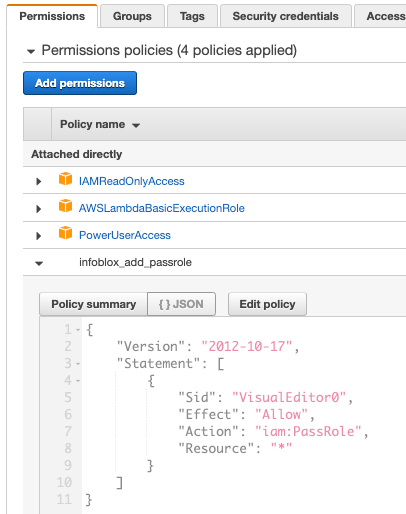
Secondly, assuming you already have your AWS Cloud Account setup, add the following roles and permissions to your AWS vRAC user.
- IAMReadOnlyAccess / AWS Managed Policy – Needed when adding the InfoBlox Integration
- AWSLambdaBasicExecutionRole / AWS Managed Policy – Used by the plugin to run Lambda functions
- IAM:PassRole / Inline policy – Needed when adding the InfoBlox Integration
Here is a screen shot of my working AWS Policy and Permissions for the vrac user account.
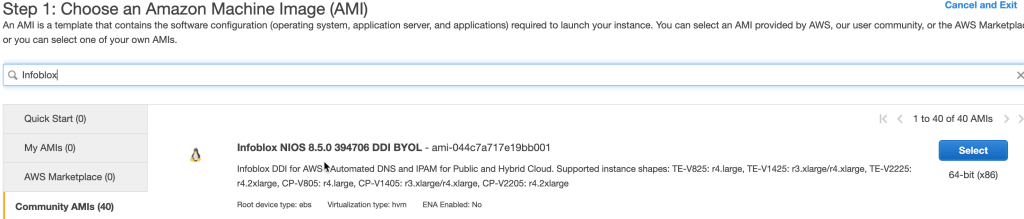
Now on to deploying the InfoBlox for AWS AMI. This deployment requires two subnets in the same availability zone. Detailed installation directions start on page 22 of the NVIOS for AWS document. Make sure to select one of the DDI BYOL AMI’s. I’m using ami-044c7a717e19bb001 for this blog. Here is a screen shot of the search of the community InfoBlox AMI’s.
Some notes on the AMI deployment. 1., Make sure the additional (new) interface is on a different subnet. The management interface (eth1) will need internet access. 2., Assign a Security Group which allows SSH from your local machine, and HTTPS from anywhere.
Take a 10 or 15 minute break as the instance boots and the Status Checks complete. You may use this time to assign an EIP to the ENI assigned to eth1. You can get the Interface ID by clicking on the instance eth1 interface under Instance Description and copying the Interface ID value (at the top of the popup).

Next assign a new or existing EIP to the Network Interface.

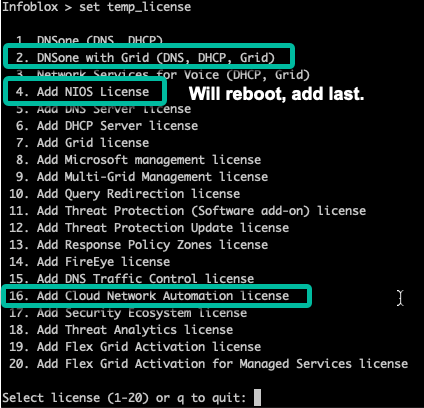
Take a 10 or 15 minute break as the instance boots and the Status Checks complete. SSH to the instance as admin with the default password of infoblox. Once logged in you will need to add some temporary licenses (Or permanent if you have them). Add the license options shown in this screen shot. When adding #4, select #2, IB-V825. This will force a reboot.
Give the appliance about 5 minutes before browsing to https://<EIP Address>. Login as admin with the default password of infoblox.
The first login will eventually send you the Grid Setup Wizard. My environment was setup using these settings.
- Step 1, Configure as a Grid Master
- Step 2, Changed the Shared Secret
- Step 3, No changes
- Step 4, Changed the password to something more complex than ‘infoblox’
- Step 5, No changes
- Step 6, Click Finish
Next enable the DNS Resolver in Grid Properties (Click on Grid, click Grid Properties, then add the DNS server under DNS Resolver.

Add a new Authoritative forward-mapping zone under Data Management -> DNS. I’m using corp.local for this article.
Then start the DNS server under Grid -> Grid Manager. Then click DNS, select the grid master, and click the start button.

Now on to discovering the VPC, Subnets and used IPs. Click on Data Management -> IPAM, then click on vDiscovery on the right hand side. I used the following settings.
- Step 1, Job Name – AWS. Member infoblox.localdomain (assuming you left everything default when setting up the grid).
- Step 2, Server Type – AWS, Service Endpoint – ec2.<region>.amazonaws.com, Access Key ID – <vDiscovery User Access Key>, Secret Access Key <vDiscovery Access Key>.
- Step 3, no changes
- Step 4, enable DNS host record creation. Set the computed DNS name to ${vm_name}
- Step 5, Click Save & Close
Here is a screen shot of my settings for Step 4 (above).

Now to run the vDiscovery. Click the drop down arrow on Discovery and select vDiscovery Manager. Select the AWS Job, then click start.
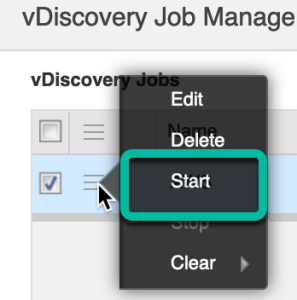
Hopefully the job will complete in a few seconds (Assuming you have a small environment). My job ran fine and discovered the two VPC’s I have in my Region.
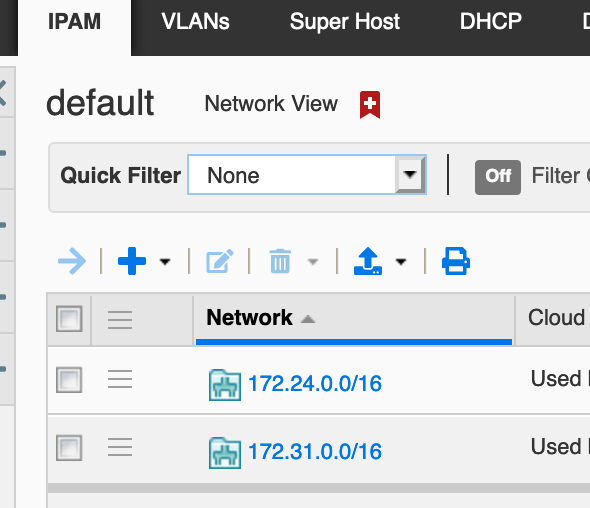
Drilling down into the first Subnet in my default VPC lists the addresses currently in use or reserved. Here I set the filter to show a Status equals used.

This should do for now. The next article will walk through the integration with vRAC, including the deployment of an AWS machine with defined IP, and one with the first available IP in a Range.
Stay tuned.
