The use case presented to me for POC was to deploy a new Azure AKS cluster then install a basic application. Simple use case, but for those using VRA you know the kubernetes capabilities are all but non existent.
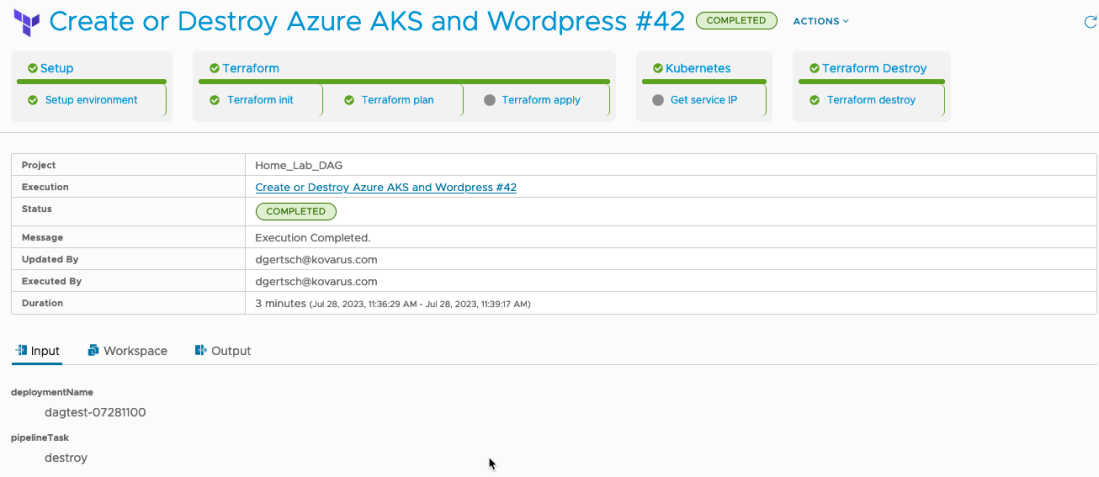
But after digging around and tinkering I figured a CodeStream (now called Pipelines) would probably fit the bill. The pipeline would run a terraform plan to build, and then destroy the deployment later on.
Keeping track of the state file between runs also presented a ‘problem’. After lots of kicking the tires I came up with a way to store the state file securing in an Azure Storage account. The state file in the container is simply the deployment name plus .tfstate. This allowed me to refer to it using day two actions and Event Broker Subscriptions (EBS).
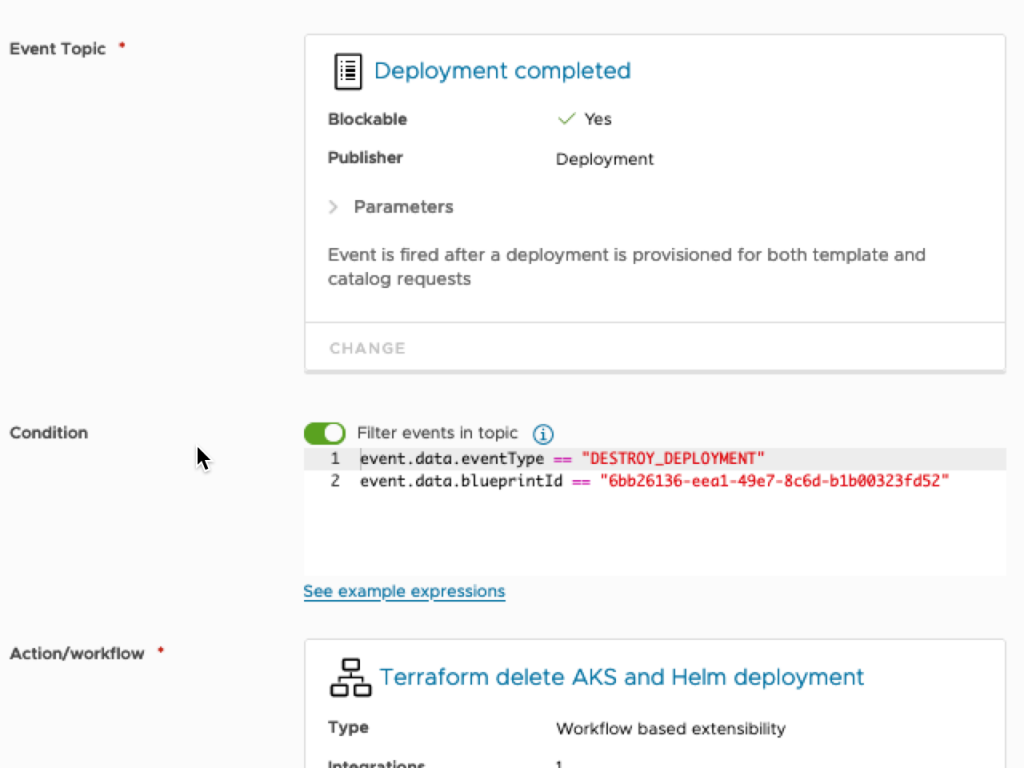
Another issue that came up was deleting ‘codestream.execution’ resources when the deployment is deleted. Since these deployments are handled by terraform I needed another WF which called a pipeline to destroy the deployment when the eventType was DESTROY_DEPLOYMENT.
The files for this article can be found at azure-terraform-blog
Terraform is used to do the heavy lifting. The backend values get replaced with some pipeline inputs in the first pipeline task. The most important one is the deployment name. When destroying the deployment, terraform will pull the current state for that deployment and do its thing.
The CodeStream pipeline (Now Pipelines) uses a custom docker image. It includes the latest version of Terraform (Currently at 1.5.4), AZ CLI, Kubectl, and Helm (for another use case). It is stored on DockerHub as americanbwana/cas-terraform-154:latest.
I didn’t come up with the basic Template. I found this article on vEducate.co.uk. A very good starting point. ‘pipelineTask’ is used by the pipeline to either create (apply) or destroy the deployment. More on that later.
formatVersion: 1
inputs:
  pipelineTask:
    type: string
    title: Pipeline Task
    description: 'Create '
    readOnly: true
    default: create
resources:
  cs.pipeline:
    type: codestream.execution
    properties:
      pipelineId: 2b80427c...
      outputs:
        computed: true
      inputs:
        deploymentName: ${env.deploymentName}
        pipelineTask: ${input.pipelineTask}
vRA doesn’t delete the actual codestream.execution items when you destroy the deployment. A workflow called ‘Terraform delete AKS and Helm deployment’ is called by an Event Broker Subscription (EBS). Make sure to update the ‘codestreamPipelineId’ in the WF variables.
And finally on to the pipeline. The initialize task copies several variables into a file, which is then sourced by most stages. Terraform apply is only fired if the pipelineTask = ‘create’. And Terraform destroy is only fired when pipelineTask = ‘destroy’.
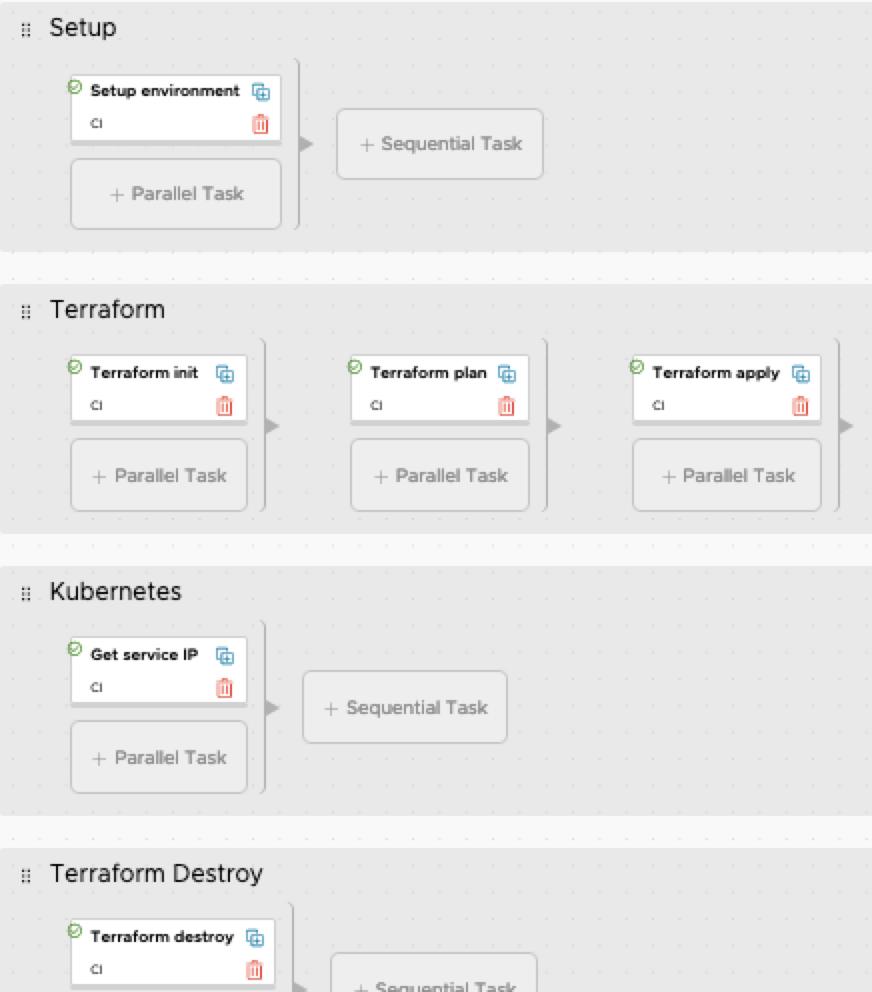
‘Get Service IP’ is also only fired if the pipelineTask = ‘create’. This task will get the IP address of WordPress and export it back to vRA.


Nuff for now. Happy coding.