One of my current tasks is to leverage vRealize Automation Orchestrator to meet the following use case.
- Get the next available subnet from InfoBlox
- Reserve the gateway and other IP’s in the new subnet
- Create a new NSX-T segment
- Create new NSX-T security groups
- Discover the new segment in vRealize Automation Cloud
- Assign the new InfoBlox to the discovered Fabric Network
- Create a new Network Profile in vRA Cloud
This weeks goal was to get the InfoBlox part working. Well I had it working two years ago, but couldn’t remember how I did it (CRS).
Today I’ll discuss how to use vRO to get the next available subnet from InfoBlox. The solution uses a PSM I build, along with the PowerShell script which actually does the heavy lifting. One key difference between my solution and the one from VMware’s documentation is the naming of the zip file. This affects how to import and use it in vRO.
The code used in this example is available in this GitHub repo. Clone the repo, then run the following command to zip up the files.
zip -r -x ".git/*" -x "README.md" -X nextibsubnet.zip .Next import the zip file into vRO, add some inputs, modify the output, then finally run it.
Within vRO, add a new Action. Then change the script type to “PowerCli 12 (PowerShell 7.1).

Change the Type to ‘Zip’ by clicking on the dropdown under ‘Type’ and selecting ‘Zip’
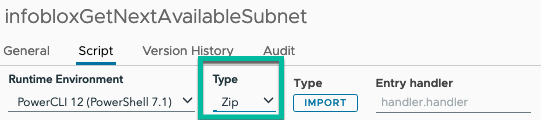
Click ‘Import’, then browse to the folder containing the zip file from earlier in the article.
You will notice the name is not ‘nextibsubnet.zip’ but InfobloxGetNextAvailableSubnet.zip. The imported zip assumes the name of the vRO Action.

Now the biggest difference between my approach and the VMware way. If you look at the cloned folder you will see a file named ‘getNextAvailableIbSubnet.ps1’. The VMware document called this file ‘handler.ps1’. Instead of putting in ‘handler.handler’ in ‘Entry Handler’, I’ll use ‘getNextAvailableIbSubnet.handler. This tells vRO to look inside ‘getNextAvailableIbSubnet.ps1’ for a function called ‘handler’.

Next we need to change the return type to Properties, and add a few inputs.
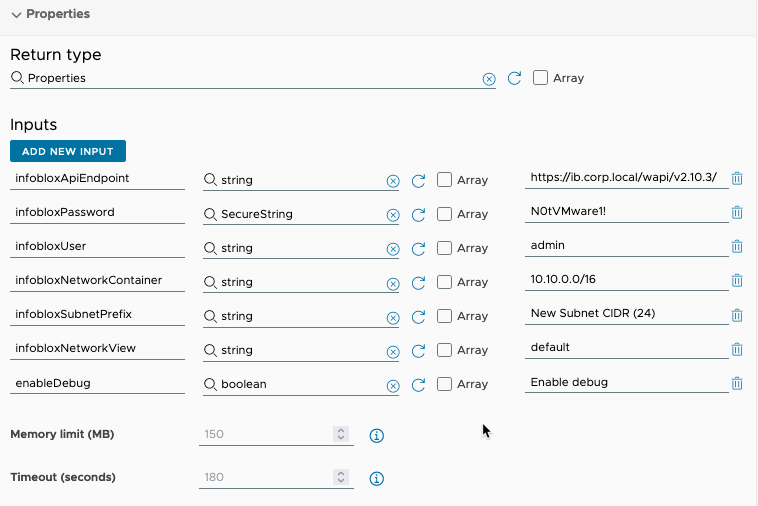
Save and run. And if everything is in order, you should get the next InfoBlox subnet from 10.10.0.0/24. The results from the action run.


So there you go. Now on to the next adventure.
